
Podcast Studio Setup Ideas: Top 10 Inspiring Studio Designs
Podcast studio setup ideas for every space: 10 inspiring designs plus easy tips on sound, lighting, and budget to build a studio you’ll love recording in.
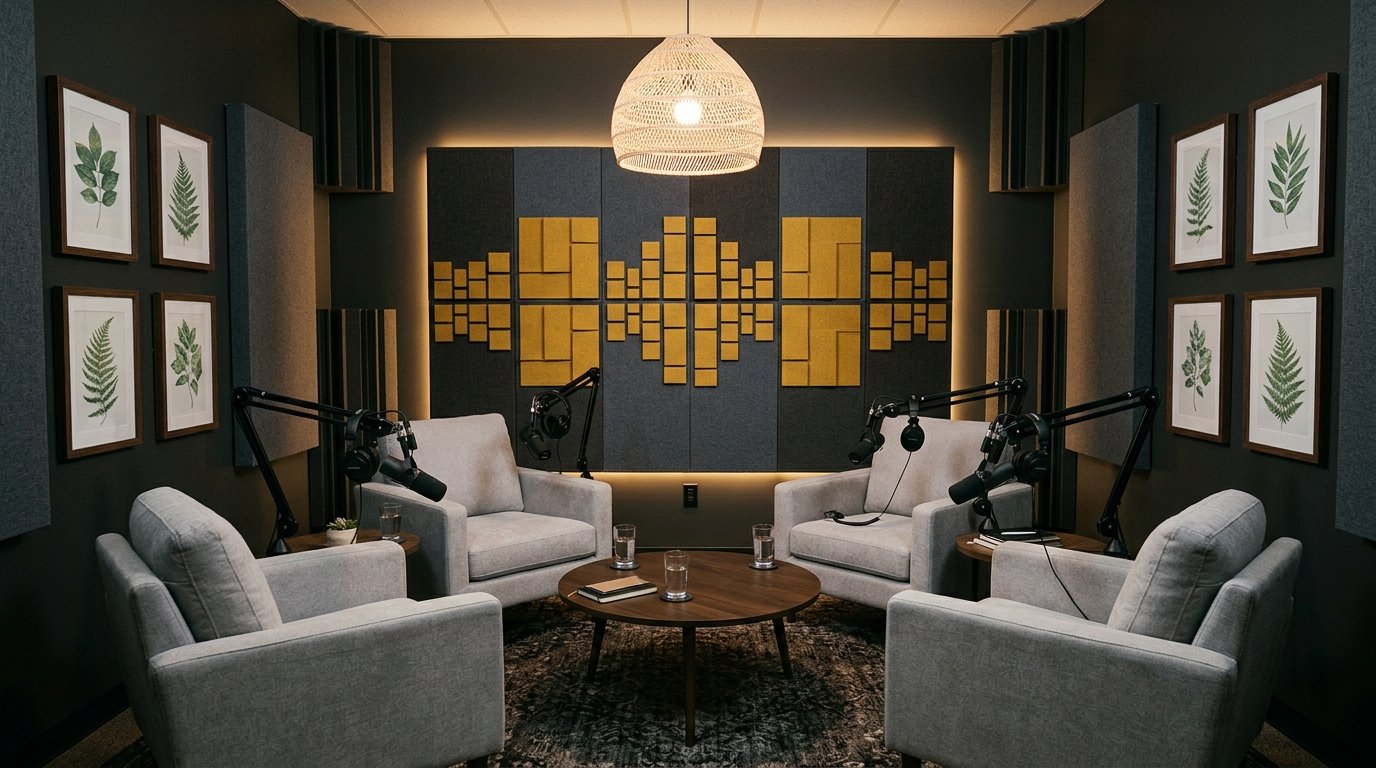
Every great show starts with a space that makes you want to hit record. You do not need a professional sound booth, a big budget, or even a spare room to build one. You only need a clear plan, a few smart purchases, and a design that feels like you. In this guide, you will find ten of the best podcast studio setup ideas for every kind of home, from a quiet corner of a bedroom to a branded video set, along with practical advice on sound, lighting, and budget.
Whether you are launching your first episode or upgrading a setup that has outgrown your kitchen table, these designs will help you create a studio that sounds great, looks great on camera, and stays comfortable through long recording sessions. Think of your studio as a small home office with a different job: instead of focusing your eyes on a screen, you are focusing your voice on a microphone. Many of the same design rules apply, including smart storage, soft textures, warm lighting, and a layout that keeps you organized.
How to Plan Your Podcast Studio Setup Ideas
Before you buy a single panel or microphone, spend an hour planning. The best-looking studios are rarely the most expensive ones. They are the ones where the space, the gear, and the recording style were chosen together. A little planning also prevents the most common mistake buying equipment first and then discovering the room works against it.
Choose the Right Space for Your Podcast Studio
Sound quality depends on the room more than most beginners expect. A great microphone in a bad room still sounds like a bad room. When you walk through your home looking for the right spot, listen before you look. Clap your hands in each room. If you hear a sharp, metallic ring, the room has too many hard, parallel surfaces. If the clap dies quickly, the room already has soft furnishings that will help you.
Here is what to look for when you choose a spot:
- Quiet surroundings: Pick a room away from the street, the kitchen, and shared walls with noisy neighbors. Refrigerators, air conditioners, and washing machines are all sound sources that a microphone will find.
- Soft surfaces: Carpet, curtains, upholstered furniture, and bookshelves all absorb sound. Bare walls, glass, and tile reflect it.
- Furniture and ceiling height: A room filled with furniture usually sounds better than an empty one. Very large, empty rooms produce more echo than small ones.
- Natural light: If you plan to record video, a window to one side of your seat gives you flattering light for free. Make sure you can cover it for audio only sessions, since windows reflect sound and let in outdoor noise.
- Power and WiFi: Make sure you can reach outlets without stretching cables across walkways, and check your internet signal if you record remote guests.
If you are still deciding where a studio could fit in your home, the layout advice in Apartment Therapy’s guide to home office layout ideas that work for any floor plan shows how living rooms, bedroom nooks, and corners can become real workspaces. The same logic applies to a recording corner.
Plan Your Budget, Equipment, and Recording Style
Next, decide how you will record. A solo audio show needs far less than a video interview show with two guests and three cameras. Ask yourself four questions:
- How many people will record in the room at once? One host needs a desk and a chair. Three people need a round table, three microphones, and enough space to avoid bumping into stands.
- Will you record audio only, or video too? Video adds lighting, a background, and camera angles to your list.
- Will your setup stay in place, or must it pack away? A permanent studio can use wall mounted panels and built in shelving. A temporary one needs portable pieces like a rolling cart and a freestanding screen.
- What is your starting budget? Set a number now. A realistic starter budget covers a microphone, headphones, a boom arm, a pop filter, and a few sound panels.
A basic starter kit includes a dynamic USB or XLR microphone, closed-back headphones, a boom arm, a pop filter, and a simple desk. Dynamic microphones are popular for home studios because they pick up less background noise than condenser microphones. As your show grows, you can add an audio interface, extra microphones, acoustic treatment, and better lighting one step at a time.
Here is a quick budget guide to help you plan:
- Starter: One microphone, headphones, boom arm, pop filter, and a few DIY sound-dampening items such as a thick rug and heavy curtains.
- Mid range: An audio interface, a better microphone, proper acoustic panels, a comfortable chair, and a basic lighting kit.
- Pro: Multiple microphones, a mixer, wall to wall acoustic treatment, branded set pieces, and camera gear for video episodes.
10 Podcast Studio Setup Ideas for Every Space and Style
Now for the fun part. Each of these ten designs has its own look and purpose, so you can pick the one that fits your room, your personality, and your show. Mix and match details freely. A cozy studio can borrow a modern lighting idea, and a small room can borrow a branded backdrop.
1. Minimalist Podcast Studio Setup Ideas
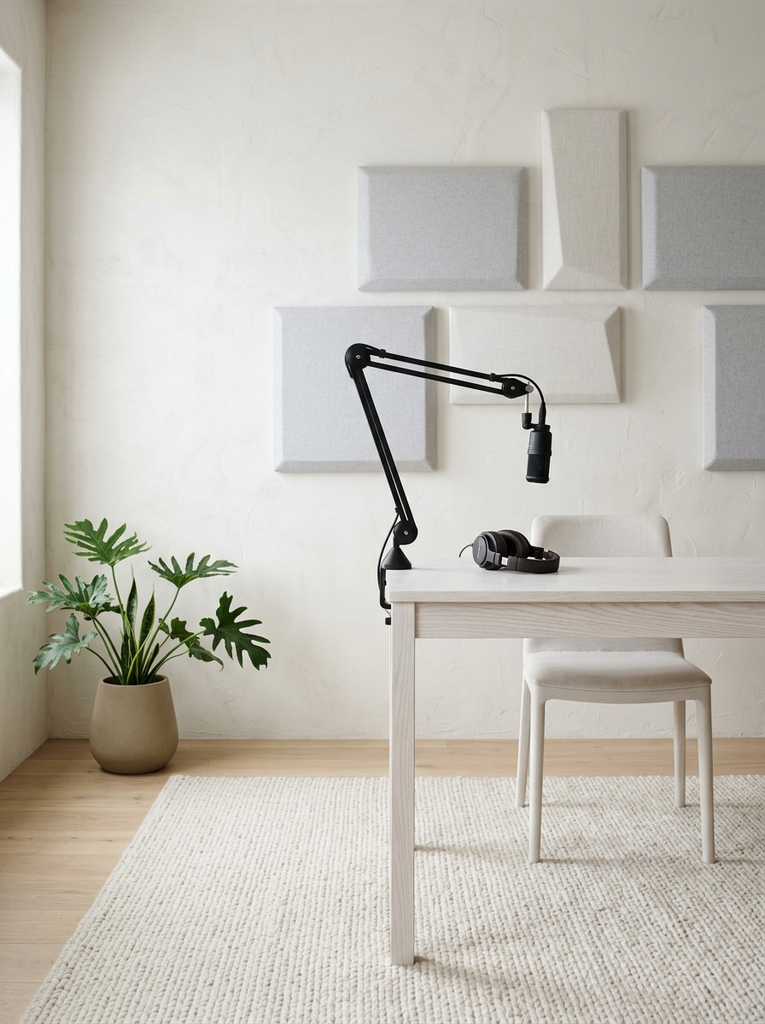
A minimalist studio is all about calm. Picture a clean white or light wood desk, a single microphone on a black boom arm, one pair of headphones, and a few well chosen panels in a neutral color. There is no clutter, no tangle of cables, and nothing to distract you or your guests.
This look works especially well if you tend to get distracted by a messy workspace. Use a cable tray under the desk to hide cords, and keep only the items you use every session in view. A small shelf can hold a plant and your notes, and everything else lives in a drawer.
To keep a minimalist studio from feeling cold or echoey, stay with soft materials a wool rug, linen curtains, and fabric wrapped acoustic panels in oatmeal, gray, or soft white. Panels in these shades blend into the walls while still doing their job. If you love this clean look, explore the soft palettes in our guide to home office color palette ideas for combinations that stay calm without feeling plain.
2. Cozy Home Podcast Studio Setup Ideas
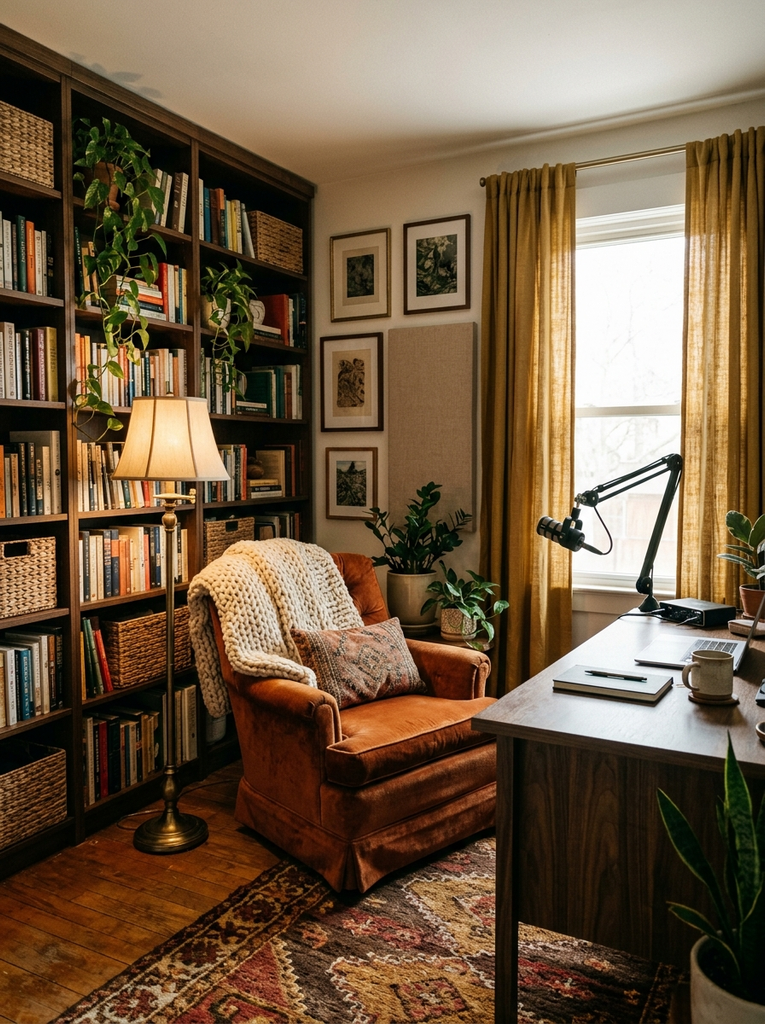
If your show feels like a conversation with a friend, a cozy studio suits it. This design leans on warmth: a plush rug, floor length curtains, a comfortable armchair or sofa, and soft lamps instead of harsh overhead lights. The extra fabric happens to be great for sound, so comfort and quality work together here.
Add a bookshelf behind your seat. Books are excellent natural diffusers, scattering sound waves so your voice sounds fuller. Fill the shelves unevenly with books, baskets, and a few small plants for extra variation in surface depth. A throw blanket over a hard backed chair, a couple of pillows, and warm-toned bulbs finish the look.
For more ideas on making a workspace feel warm and welcoming, take a look at this cozy home office inspiration from Next Idea Decor. Many of those textures and color choices transfer directly to a recording room.
3. Modern Podcast Studio Setup Ideas
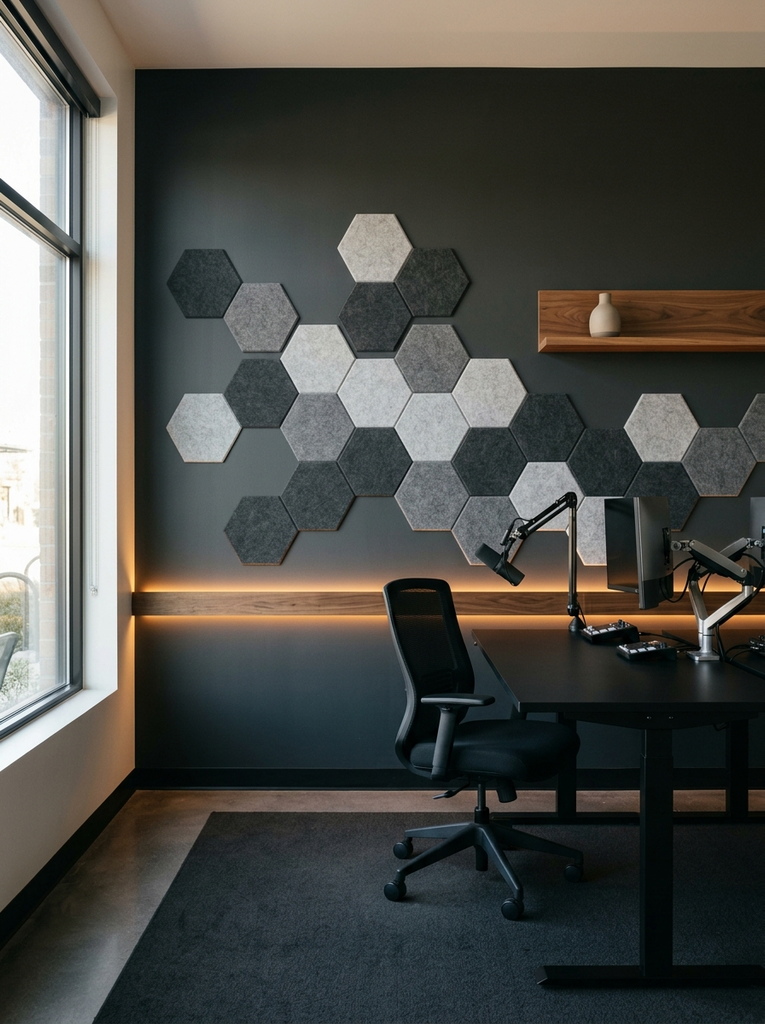
A modern studio mixes clean lines with a few bold features. Think of a sleek desk with a matte black finish, a dark accent wall, geometric acoustic panels in a repeating pattern, and a strip of LED lighting running along the wall or behind the monitor. The result feels polished and professional without being cold.
Geometric panels are the secret here. Hexagon, rectangle, and wave shaped panels double as wall art, so you get sound treatment and design in one step. Arrange them in a pattern at the height of your head when seated, where sound reflections matter most. Pair them with a simple ergonomic chair, a monitor arm, and a boom arm in a matching finish.
Keep the color palette tight. Black, charcoal, and white with one accent color, such as warm wood, deep green, or amber, make the space feel intentional. Smart bulbs let you shift the mood from bright work mode to a softer glow for recording.
4. Small Room Podcast Studio Setup Ideas
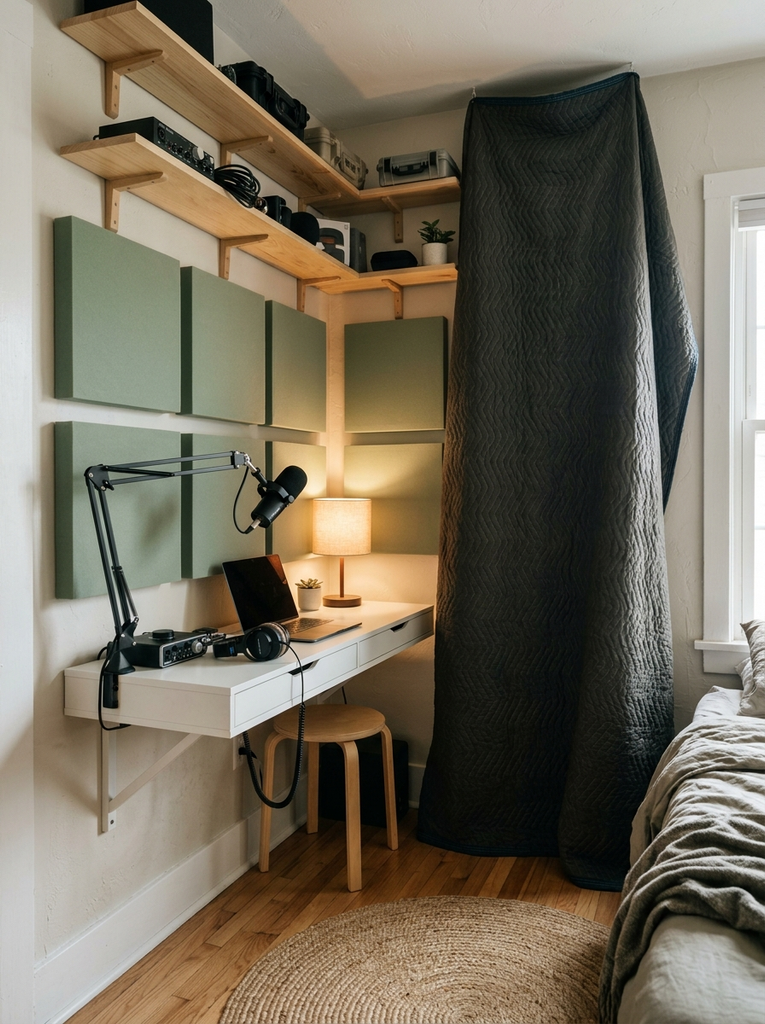
Small rooms have a reputation for sounding boxy, but they can work well with the right treatment. A walk-in closet, a corner of a bedroom, or a spare nook can all become a recording space. In fact, a closet full of clothes is one of the best natural vocal booths, because hanging fabrics absorb sound extremely well.
Here is how to make a small space work for audio:
- Treat the corners first. Corners collect low frequency buildup, so place bass traps or thick panels there.
- Use the wall behind you. Hang a panel or a heavy moving blanket behind your seat, and place another behind the microphone.
- Go vertical. Wall shelves, floating desks, and hanging organizers free up the floor so the room does not feel crowded.
- Choose a compact desk. A narrow desk or a wall mounted fold down desk leaves space to move.
- Make it portable. A freestanding vocal shield or a foldable screen can turn any corner into a studio, then pack away after recording.
Small spaces also reward careful lighting. A single warm lamp and a small ring light keep the area bright without eating floor space.
As an Amazon Associate, we may earn a commission from qualifying purchases at no extra cost to you.
5. Industrial Podcast Studio Setup Ideas
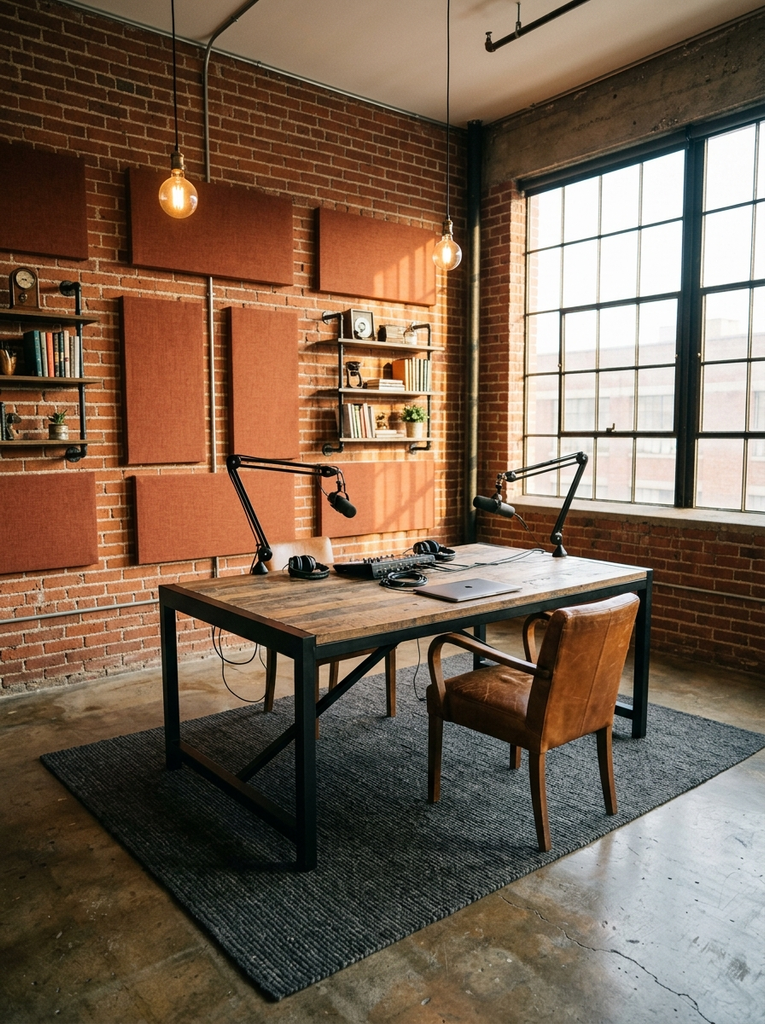
An industrial studio brings out the raw, creative side of a space. Think exposed brick, a dark metal desk frame, a reclaimed wood tabletop, black metal shelving, and Edison style bulbs. It suits shows with an edgy, music, or storytelling feel.
The challenge with industrial design is that brick, concrete, and metal are all hard surfaces that reflect sound. The fix is to balance the look with soft elements: a large area rug over a concrete or wood floor, heavy canvas curtains, and fabric acoustic panels in charcoal or rust that match the palette. A leather chair or sofa adds warmth and absorbs some sound as well.
Keep the layout open. Wall mounted pipe shelving, a metal rolling cart for gear, and a vintage style lamp keep the look authentic. If you want to see how mixed materials and an industrial feel can work together in a room, look at some of the combinations in our guide to old money office ideas, where dark wood and metal accents are balanced with rich textiles.
6. Creative Podcast Studio Setup Ideas with Colorful Backdrops
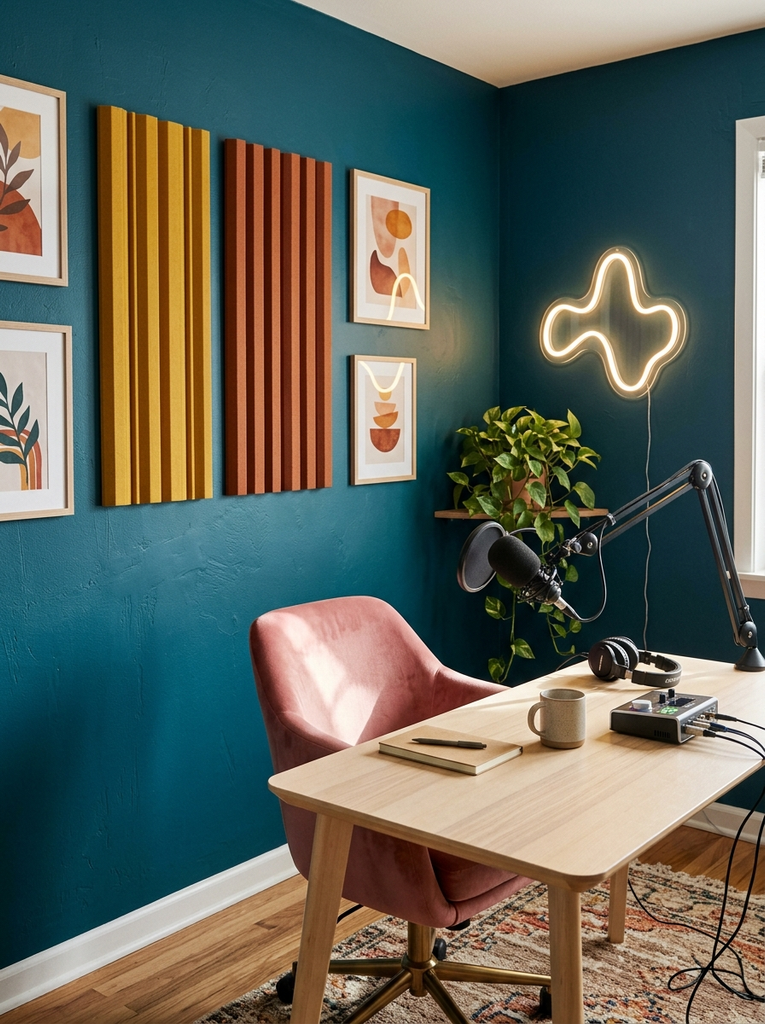
If your show is playful, energetic, or youth focused, let color do the talking. A bold painted wall behind you can turn a plain corner into a memorable backdrop. Deep teal, mustard, terracotta, forest green, and dusty pink all look rich on camera and give your video episodes an instant signature look.
You do not have to paint to get the effect. Peel and stick wallpaper, a large fabric hanging, or acoustic panels in multiple colors can create the same bold impact and are easy to remove if you rent. Mix colors on the panels in a simple pattern, such as stripes or blocks, so the wall works as sound treatment and art at the same time.
Balance a loud wall with calmer surroundings. Keep the desk and chair neutral, and let one bold color lead. Add a neon sign with your show name or a favorite word, a few plants, and some framed prints, and the studio becomes a reflection of your personality.
7. Professional Podcast Studio Setup Ideas with Branding
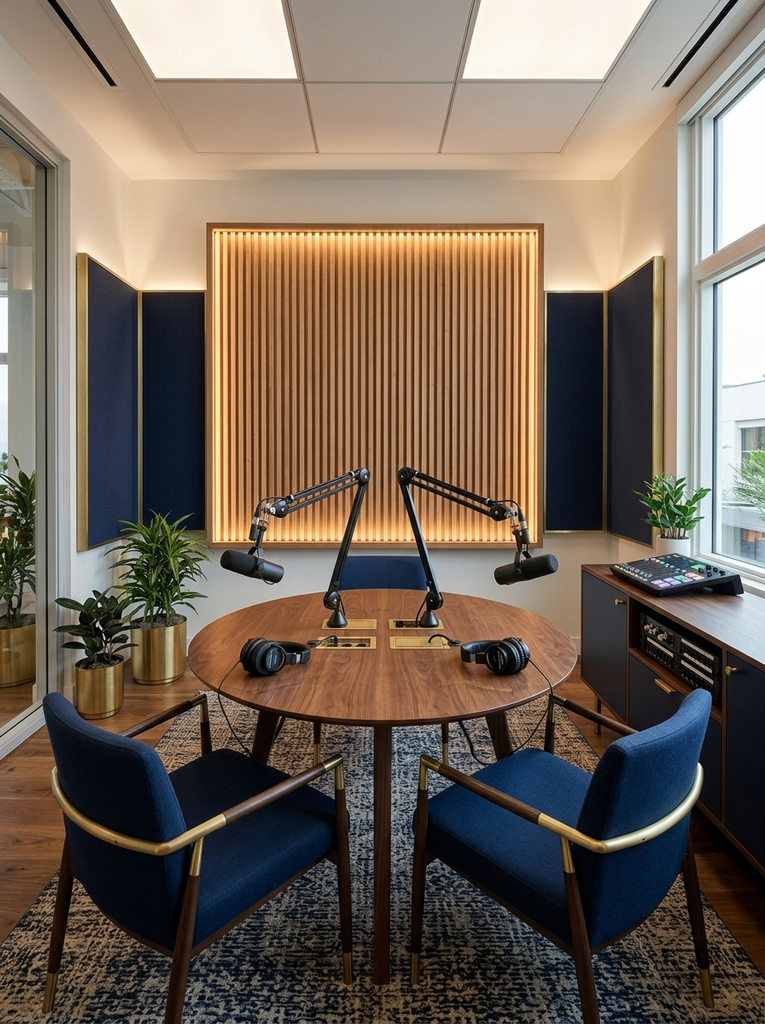
When your show grows, your studio can grow with it. A branded studio uses consistent color, logo placement, and styling so every episode feels recognizable, whether people watch a clip on social media or the full video on YouTube.
Start with your logo or show name as a backdrop feature. A backlit sign, a wood or acrylic wall logo, or a printed panel placed directly behind the host all work well. Choose two or three brand colors and carry them through your panels, cushions, plants, and lighting. Keep the rest of the studio simple so the brand stands out.
Think about the camera frame as you decorate. What appears behind your head and shoulders is what viewers see, so style that small area with care: a neat shelf with a few props related to your topic, a plant, and one strong brand element. A professional studio also keeps the technical side tidy, with labeled cables, a proper mixer or audio interface, a boom arm for each microphone, and matching chairs for guests.
8. Nature-Inspired Podcast Studio Setup Ideas
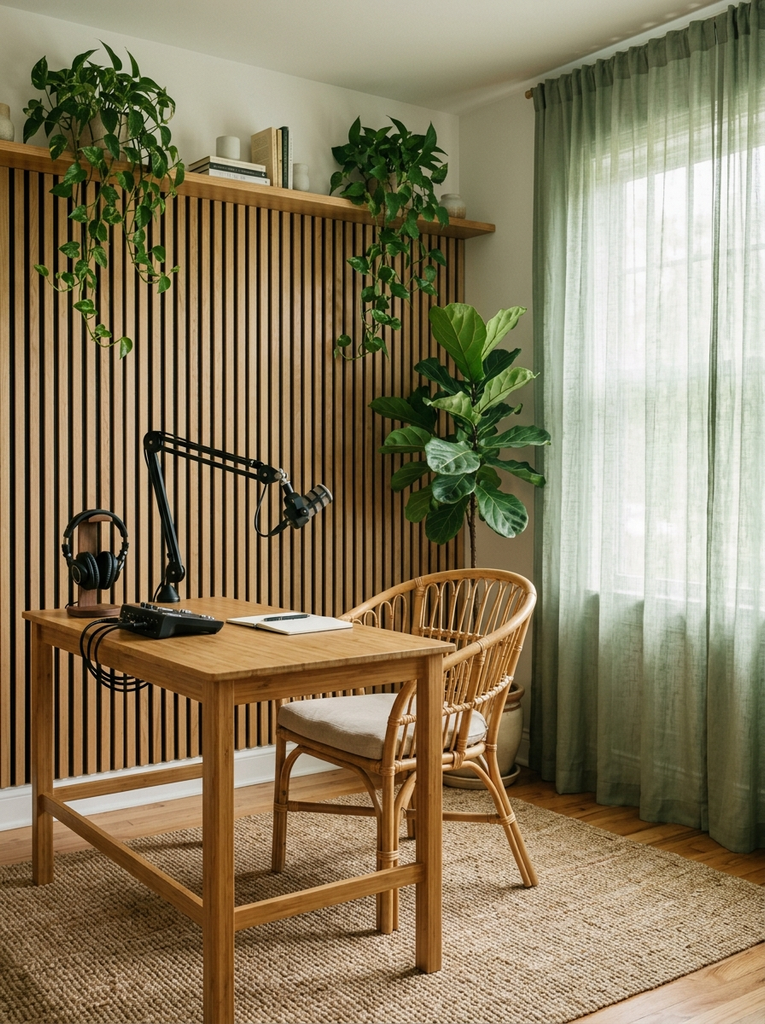
A nature-inspired studio helps you and your guests relax. Think wood slat panels, woven baskets, linen curtains, a jute rug, and plenty of greenery in soft earthy tones such as sage, sand, and warm brown. The room feels peaceful, which often leads to calmer, more natural conversations.
Wood slat wall panels are a good choice, since the gaps between slats break up sound reflections and many versions come with a felt backing that absorbs sound. A large plant in the corner, a few trailing plants on a shelf, and a small bamboo or wooden desk complete the scene. Real plants soften the room visually and add a little diffusion, though they do not replace real acoustic panels.
Let in as much daylight as you can for video sessions, but use sheer or blackout curtains you can close during audio recording to cut outside noise. Warm, dimmable bulbs help you keep a gentle glow in the evening.
9. Budget Friendly Podcast Studio Setup Ideas
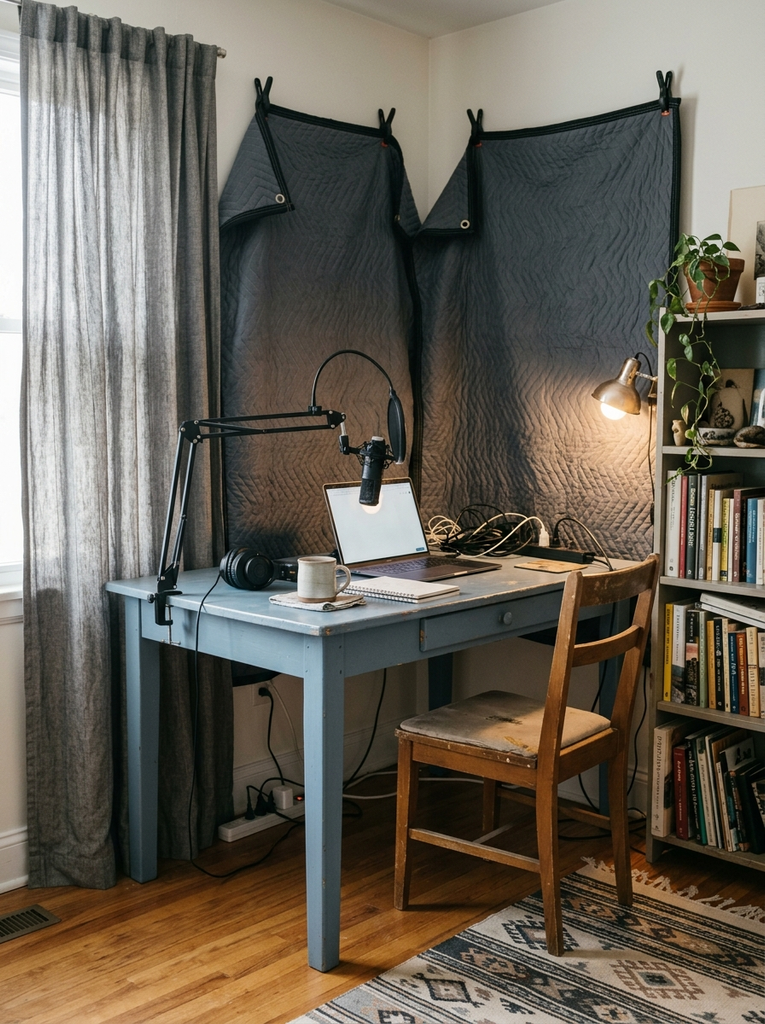
You can build a respectable home studio with a small budget if you spend carefully and use what you already have. Start with the three things that matter most a decent dynamic microphone, a pair of closed-back headphones, and a quiet corner. Everything else can come later.
Use these inexpensive tricks to improve your space immediately:
- Thick moving blankets or duvets hung on the walls behind you and behind the microphone absorb echo.
- Bookshelves filled with books scatter sound and cost nothing if you already own them.
- A rug and heavy curtains reduce reflections from the floor and windows.
- A closet full of clothes makes a free vocal booth.
- DIY panels made from rigid mineral wool or fiberglass wrapped in breathable fabric cost less than ready made ones. Use appropriate dust safe materials and cover them fully.
- A used desk and chair from a local marketplace can look great with a coat of paint.
Upgrade gradually. Add a boom arm, a pop filter, and a small light, then panels, then a better microphone when your show earns it.
10. Video Podcast Studio Setup Ideas with Stylish Lighting
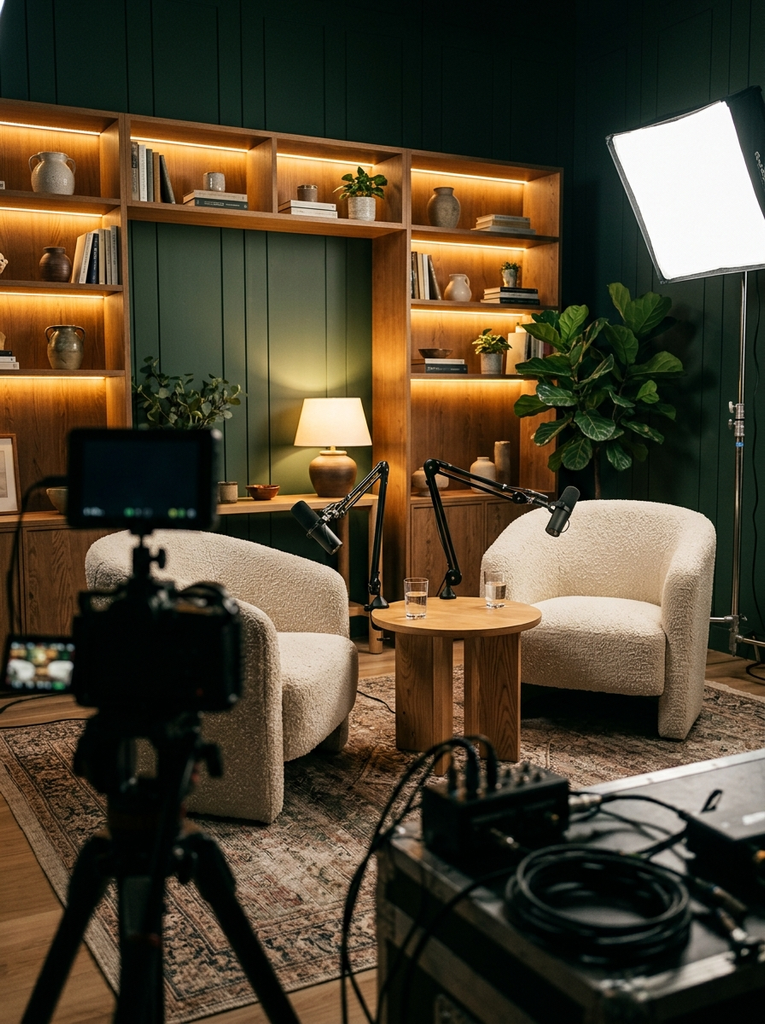
Video podcasts have changed what a studio needs to look like. Viewers now judge your show in the first few seconds, so lighting and background matter almost as much as sound. The good news is that great lighting is mostly about placement, not price.
Use the classic three point idea in a simplified form:
- Key light: A soft, diffused light placed at about a 45-degree angle in front of you, slightly above eye level. A softbox or a ring light with a diffuser works well.
- Fill light: A dimmer light on the opposite side, or a white reflector, to soften shadows.
- Background or accent light: LED strips, a lamp, or a backlit shelf behind you to create depth and separate you from the wall.
Choose lights with adjustable color temperature so you can match natural daylight or create a warm evening look. Keep light fixtures out of the camera frame when you can, and place cables out of sight. For a stylish touch, use practical lights in the background, such as a small table lamp, a neon sign, or a row of LED panels in a color from your brand palette. Place the camera at eye level, and keep a clean, uncluttered area behind you so viewers focus on the conversation.
How to Improve Your Podcast Studio Setup on a Budget
Once you have chosen a style, small upgrades make the biggest difference. You do not need to rebuild your room. Focus on improvements that give you the most sound and visual quality per dollar, and add them in the order that matters sound first, then lighting, then looks.
Affordable Ways to Improve Sound Quality
Poor room acoustics are the number one reason a home recording sounds amateur, and most fixes are inexpensive. Try these steps in order:
- Get close to the microphone. Speak three to six inches from a dynamic microphone. Proximity reduces the amount of room sound that the microphone picks up.
- Use a pop filter and a boom arm. A pop filter softens harsh “p” and “b” sounds, and a boom arm keeps the microphone off the desk so it does not pick up keyboard thumps and vibration.
- Treat the first reflection points. Sit in your normal position and have someone slide a mirror along the side walls. Anywhere you can see the microphone in the mirror is a spot for a panel or a thick blanket.
- Add a rug and curtains. Hard floors and bare windows reflect sound back to the microphone. Soft furnishings soak it up.
- Turn off noise sources. Switch off fans, air conditioners, and humming electronics during recording, and silence your phone.
- Wear closed back headphones. They keep audio from leaking into the microphone and let you hear problems as you record.
- Test and record a room sample. Record thirty seconds of silence, then listen with headphones to hear what the room is adding. Fix the loudest problem first.
Remember that acoustic panels absorb sound inside the room, while soundproofing blocks sound from entering or leaving. Home studios usually benefit more from absorption. If outside noise is your main problem, record at quieter times of day instead of investing heavily in soundproofing.
Simple Lighting and Background Upgrades
You can improve your video look without a studio budget. Begin with these changes:
- Face a window. Sit facing soft daylight instead of with the window behind you, which turns you into a silhouette.
- Add one soft light. A small LED panel or ring light with a diffuser, placed slightly above eye level, fixes most lighting problems.
- Add depth to the background. Place a lamp, a plant, or a shelf a few feet behind you instead of sitting directly against a wall.
- Declutter the frame. Remove random items and keep two or three that reflect your show’s topic.
- Choose one color theme. Pick a main color for your backdrop, props, and clothing to create a consistent look.
- Use warm bulbs for ambience. Keep all your lights the same color temperature so your skin tones look natural.
Frequently Asked Questions About Podcast Studio Setup Ideas
What Equipment Do You Need for a Basic Podcast Studio Setup?
A basic setup needs a microphone, headphones, a boom arm or stand, a pop filter, a computer, and recording software. A dynamic USB microphone is the simplest choice for beginners because it plugs straight into your computer and handles untreated rooms well. If you want to grow later, choose an XLR microphone and add an audio interface, which gives you better sound quality and room to add more microphones. Add a comfortable chair and a desk at a good height, and you can start recording.
How Do You Set Up a Podcast Studio in a Small Room?
Start by choosing the quietest corner and placing your desk so you face into the room, not toward a bare wall, which keeps reflections away from the microphone. Treat the corners and the wall behind the microphone with acoustic panels or heavy blankets. Use vertical storage, such as wall shelves and a floating desk, so the floor stays open. If space is very limited, use a closet or a portable vocal shield to create a small recording booth, and add a rug and curtains to cut echo.
How Can You Improve Sound Quality in a Home Podcast Studio?
Focus on the room first and the equipment second. Add soft furnishings such as rugs, curtains, and upholstered furniture. Place acoustic panels at the first reflection points and behind you. Speak close to a dynamic microphone, use a pop filter, and mount the microphone on a boom arm. Switch off noisy appliances and record during quiet hours. These simple steps usually improve your sound more than buying an expensive microphone.
Conclusion: Choose the Best Podcast Studio Setup Ideas for Your Space
The best studio is the one you will actually use. Start with the room and the sound, then add the style that makes you feel inspired every time you sit down to record. A minimalist desk, a cozy reading nook, a bold colorful wall, or a fully branded video set can all produce excellent results when you pay attention to acoustics and lighting.
Pick one or two of these podcast studio setup ideas that suit your space and budget, and start small. Add a rug, hang a few panels, improve the light, and upgrade your gear as your show grows. Every great show began with a modest corner and a good idea, and yours can too.